Sunday, June 10, 2007

June Friday Nighter

We didn't win. We didn't even come close.

That said, Hans navigated his first FN event, and in UNL class no less in a very dirty Saab with street tires hastily bolted on after No Alibi. Boost is still intermittent. We had it on the way to the rally, but as soon as the event started it went away. Gotta be a wire issue.

We zeroed 3 out of the 4 checkpoints. As in no points -- that's a good thing. It wasn't super trappy but there were tons of CASTs and lots to do on the right hand side of the car, where Mr. A sits. His slight mistake on the second leg (worth a handful of points) was overshadowed by my inability to see the transit-to-pizza trap that made us miss the on-course route control. That slip was worth 30 points. I don't feel so bad since I have averaged about one FN per year for the last three years...So we ended up with a pretty big score, but no one else zeroed legs like we did so we feel purty good about that.

But !! Three sections of zero! One was a gimme (about a half mile from the end of the odo check) but the other two were handled nicely and involved quite a lot of work from the right side of the car. Well done, if I do say so.

Hans continues to pick up the intracies of the Timewise and has passed my ability to help him.

Tuesday, June 05, 2007

Fuel level sender reinforcement

Tools needed: medium channel lock pliers, JB Weld epoxy, retrieval tool.

After a number of rallies on some rough roads, I've had four fuel level senders break off withthe sadness of a Saab 900 broken fuel level senderin the tank. I suspect it's the result of the fuel slapping around in the tank while bouncing down the road, sometimes sideways, sometimes on some pretty good bumps or even little jumpy bits of road.

The sending unit is a tube that hangs down inside the top of the fuel tank and cannot take the stress from the fuel sloshing around. It breaks at the attachment point at the top of the tube, and the tube, inner rod, the float, and other small bits end up inside the tank. The top of the sending unit remains sealed onto the tank and the only symptom is a complete lack of movement on the dash fuel gauge.

You can buy new units from Saab or other vendors such as eEuroparts. After buying a new one and promptly breaking it two weeks later I prefer to get used senders out of cars at theJB Weld does not sponsor this blog junkyard.
Wherever you get your sender, you'll want to make it better and stronger and faster. Well maybe not faster but certainly stronger. JB Weld will not dissolve in the presence of gasoline and is a good choice for strengthening the bond between the tube and the top of the sender. You've got JB Weld in your tool kit, right? It's just under duct tape and baling wire in the list of Extremely Important Basic Tools.
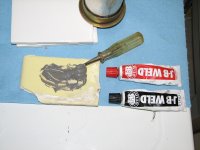
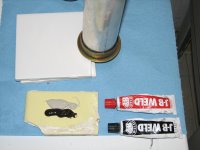
JBWeld ready to go

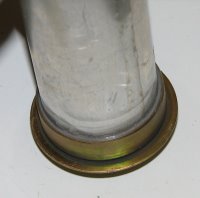
A couple of one inch stripes of each tube is plenty. Mix it well, then massage it into the gap between the brass colored top and the aluminum tube. I use a cruddy old screwdriver which will clean up ok before the stuff cures. I suggest not putting it around the entire circumference of the tube -- leave a few sections clear to allow for fuel and vapor passage. Try not to get any excess on the brass colored top as it may affect the seal and cause leaks or fuel smell in the car. Wipe off any excess and prop it up so that it's upside down and give it plenty of time to cure. I leave it for 24 hours. Once the epoxy is cured, you're ready to install your new and improved sender.
JB Weld in the gap

Getting to the fuel level sender is fairly simple in the classic 900 hatchback. First pull up the spare tire hatch and remove it. Depending on the model you'll either need to disconnect the rubber hinges or remove some screws. Next the larger piece of carpet-covered plywood needs to be removed. In my '85, this just pulls straight back and up. On newer models you'll need to remove a couple of screws. Either way make sure you don't pull straight up, as the clips under the plywood will bend and/or break. Pull back about 3-4 inches and then it'll come right out.

Now you'll see two covers in the hatch floor. The larger one on the left is the fuel pump cover. You don't need to mess with that, but this is a good time to check that it's firmly sealed. If you have fuel smell in the car, esp. after a fillup, a loose cover here may be the problem. If there's fuel sitting on top of the pump, it's possible that the pump and/or pump seal is bad. Re-seat the cover for the fuel pump access - it just presses on. Check it again -- it's kind of tricky to seat it properly.

The smaller rubber-booted cover on the right is the access for the fuel level sender. This is a good time to disconnect the negative terminal of the car's battery. You do not want any possibility of a spark in your work area because you will be looking inside the open fuel tank. Putting out your cigar at this point is a Good Idea.

Disconnect the plug from the top of the fuel sender. There are different models for different years -- on the '85 it's a three prong connection in a square configuration. Older models have the plug in an arc with three wires. Newer ones have a different connector. To give yourself a little extra room, you can disconect the connection to the fuel pump that is also accessed in this area. Move the wires out of the way.

The sender is secured to the tank by a plastic ring that screws down over the top of it. Kind of like the old mason jars the ancients used to preserve fruits or veggies (I do miss those). It will most likely be very tight and impossible to get loose by hand. I use a medium channel lock pliers to move it around in small increments. If it's really stuck, you can grip the lock ring in the pliers and tap it around with a hammer. Once you get it started it should come off pretty easily. There's a special Saab tool to remove these of course but I've only seen the blurry picture of one in the Bentley manual.

Remove the lock ring and you should now be able to pull up the top of the old broken sender. Don't throw it away yet -- there's a rubber gasket you'll need to pull off it if you forgot to get a new one. Check the seal and make sure it's not all grody. Or grotty.

Now is the fun fuel fishing part of the project. Getting the old tube, bottom and rod out of the tank is your goal. Leaving them in the tank probably won't cause a problem but the odds of an odd sound from them rattling inside the tank are enough to make this step worthwhile. If you're wearing chainmail or any other spark-inducing clothing now is a good time to change. No power tools, butane torches, or similar should be used because going kaboom would be bad. My favorite fishing tool is a parts retriever that is about three feet long and has a plunger that activates a claw on the end. This is a vital shop tool and well worth the price when you need it. Great for fishing wiring under carpet, through firewalls, and grabbing dropped bolts from inconvenient places in the engine bay, it also works well for grabbing your friend's french fries from a distance as well as to get the old fuel level sender pieces out of the tank. Make sure it's clean before you go sloshing it around in your precious petrol.

A coat hanger will work as well and adds an additional element of challenge.

Once you have the bits out, you'll see that the weak point of the unit is close to the top, where the aluminum tube attaches to the brass-colored section. The whole thing is held together with that wimpy rod and some crimps at the top. Fortunately we have the augmented sender to replace the busticated one.

Install the sealing ring on the sender. Slowly insert into the tank, as it will overflow if the tank is full and it takes time for gas to fill the sender. Recall the orientation of the plug when you removed the sender and orient it so the plug is 180 degrees off so that when you tighten it it'll be in the right location for reattaching the wiring. Make sure the locking ring goes on straight. It should start screwing on easily, then make it snug. I give it a good 1/4 to 1/2 turn with the pliers before calling it good enough. Reattach the wiring for the sender. Notice that you let the top spin too much and the wires won't reach. Re-read this paragraph and try again.

Don't forget to reconnect the fuel pump connection if you disconnected it! Yes I've done this and it's challenging to start the car if the fuel pump has no power.

Soak up any spilled fuel in the depression around the sender with paper towels.

Connect the battery and turn the key to make sure the sender works -- you should see the level correctly displayed on the gauge now. I've done enough of these to learn that there are variations between senders and that sometimes a replacement will not display a full or empty tank at the same place on the gauge you got used to. Cope.

In the immortal words of repair manuals everywhere, installation is the reverse of removal, or something like that.

In one instance my replacement didn't work properly. In fact it's the one shown in these photos. You might notice (unlike me when I acquired it) that the base is slightly bent -- I think it was damaged in the car it came out of and the float inside the tube gets stuck.

I've now completed a couple of fairly brisk and rough TSD events with these reinforced senders and so far have not had them fail. As they say, Your Mileage May Vary. Good luck.

Thursday, May 31, 2007

Boost woes

I've had problems with the '85 and proper turbo boost for a while now. It's pretty driveable, but the lack of a kick is getting me down. Plus I think the issue is affecting first gear take off.

So I've been chasing a couple of ideas... removed the knock sensor, wrapped in a rag, and drove around with no boosty love. Phase II.

That involves cleaning the APC solenoid. It likes to be clean. Still no love.

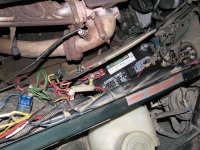
Next step: check the wiring. Let's start with the APC. For this year, the '85 has the APC box under the rear seat. If you weigh about 3 kazillion kilos, it's hard to get back in there without removing things like seats. Anyhow, it turns out the plug into the APC, which is the magic box that sez how much we can boost, is not fully engaged. It has a commitment problem with the system. That is not all, though, as the plug won't go in even with a threat from a shotgun wielding daddy. So I think there's some more wiring fun in store.

Stay tuned. Hans and I have about one evening to figger it out before No Alibi rally. And odds are on other things getting done, like family obligations and the video for Sat. night entertainment. It's gonna be a cool compilation of Press On Regardless rallies going back to the late 1960s. Nothing like it in the world, daddy-o. Besides, there's still plenty of grunt under base boost. Right? Right!

Monday, May 28, 2007

A new Saab in the family

Yesterday I picked up a 1986 900 Turbo that I found on craigslist. It wasn't too far from home so I stopped by to have a look last week. It had been parked for eight months and the owner had used it as a construction work vehicle prior to that so the interior was in pretty bad shape. However the body has no apparent rust, decent paint, and is very straight. Tires are decent and AC blows cold. All the electrics seem to work ok. It apparently has a leaky brake caliper which has caused problem with the clutch. Started and idled fine. A couple of days later Hans and I stopped by for a second look and while preparing to move the car outside from it's place in a parking garage to view it in the daylight it died and refused to restart. I made a very low offer and went away. Late the next day I noticed that it was still listed with a lower price, so I called and negotiated a compromise.

On Sunday Hans and I went over with a spare battery to provide lights and towed it home with my 1990 900. The brakes were a little dicey, and the rain didn't help things but traffic was light due to the holiday and we had no problems. After getting it home, we were able to get it started again. The former owner had added gas to try and start it but we figure it didn't get enough cranks to pump the fuel to the engine. It still acts fuel-starved however, and will be getting a complete tune up and filter replacement and then we'll see where we stand.

Another Saab friend has a complete interior that should swap in with no problem for a reasonable price. A new headliner, a good wash and wax, and perhaps a replacement brake caliper and it should be on the road in a week or two.

Cost of car: $200
Initial parts order: about $150

Will get some pics after it's had a good wash, which it desperately needs.

Catching up on the green '85

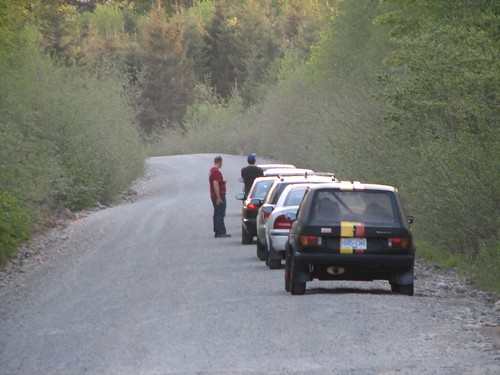
Cars line up at Coast to Coast
Yikes. Too much time since the last update.

Plenty of work on the green car since Tbird, including:
  • new fuel filter
  • rewired right side engine harness
  • new ham radio installed
  • replaced the fuel level sender - twice
  • installed a 2nd odometer sensor for the rally computer
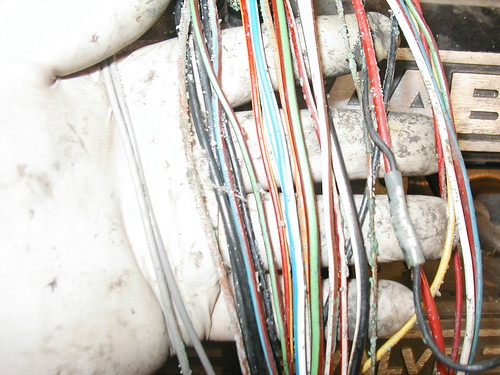
  • removed the trailer hitchrotten wires need replacing
Along with all that, Hans and I went up to Vancouver Island to compete in the Coast To Coast rally a few weeks ago, where we gained a lot of experience and had some good checkpoints. Unfortunately a couple of wrong turns led to a giant score. However it was an excellent experience, with great roads and nice folks competing in and running the event. They held it as an all nighter, going from 8pm to 7am, which avoided dealing with local traffic and logging trucks.
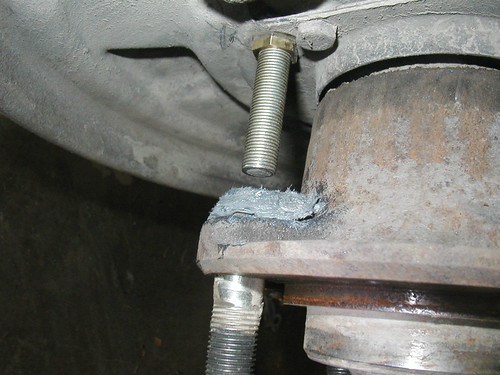
New wheel sensor and magnet mounted to right rear hub
Next up: No Alibi 2007.

Friday, March 30, 2007

Thunderbird 2007 report


Thunderbird 2007 Rally, up in British Columbia, was a few weeks ago. Hans came along as a navigator, running the Timewise computer for the first time and experiencing right seat duties. He did a great job, considering the amount of information to take on board, along with my less than helpful help from the wrong side of the car.

Jeff did a wonderful write-up on the TeamD site. Congrats to Satch Carlson and Russ Kraushaar in the 1969 Saab Sonett for first place overall. They really showed the newer AWD cars how it should be done -- front wheel drive and no excess power!

I have many more pics on Flickr.

Saab Head


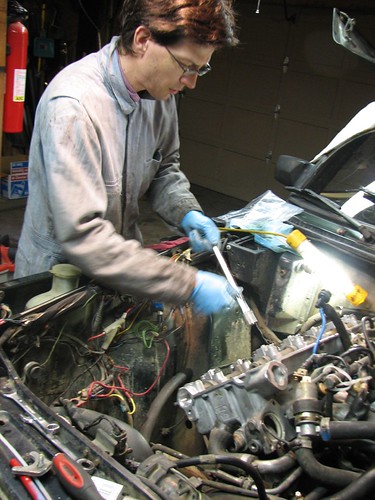
A few weeks ago I finally got around to getting the head rebuilt and replaced. With the help of Hans, it wasn't too bad of a job. We figured that at some point in the not too recent past the head gasket had been replaced, as it came off nice and easy. The intake manifold was another story, though. Spent more time cleaning that off than just about any other procedure.

Unfortunately the shop that rebuilt the head I rescued from a junkyard did not remove the old exhaust manifold studs. However with some judicious hammer action, they were persuaded to hit the road. Nice fresh studs and nuts were used in the reassembly.

Test drove for a week and the hesitation under hard boost is now gone. The valve cover was pretty leaky, with a lot of oil going in cylinder #1, so I don't know if the cause was the bad plug threads in #2 or the excessive oil around the #1 plug. At this point I don't care 'cause it's solved!

Next step is to tune the wastegate. Thanks again to Hans for his help in freeing this up.

After that comes the engine compartment rewiring. Need to do that before the next rally, which I hope to be Coast to Coast up on Vancouver Island in May.

Wednesday, February 14, 2007

Interior lighting and TBird prep

Saab 900 console wiring
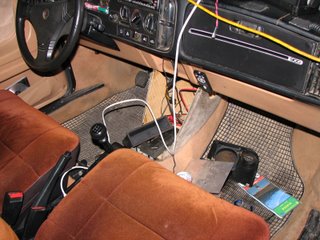
After the ham radio failed a while back, I finally pulled it out to get repaired. While I was in there, thought it was a good time to chase down the problems with interior lights. Not so fun to need a flashlight in the winter months to find anything in the car...

Limited progress was made tonight. Now the clock works and the lights don't stay on all the time. They even come on when the driver's door is opened. The passenger door switch wiring is screwed up from a previous owner's alarm installation so that will have to be chased down latert. And the trunk light still doesn't work correctly so I disconnected it. But it's better than it was before -- dome and map light now will come on when needed.

Oh -- and finally purchased a new battery. It's the correct size so shouldn't be rubbing up against the heatshield and exhaust elbow.
heatshield and power wiring
Found some more rotted wiring insulation, in the right hand harness near the door switch and fixed that (temporarily -- some day it'll all get re-wired).

Also tightened up the dash speakers and cleaned some of the dust out of cracks and crevices. Should sound a little better or as good as cheapo speakers in a poor location can sound anyhow.

Parts to fix the ham radio should arrive tomorrow, then will get Eric to help solder them in.

After that it'll be time to pack up for the Thunderbird Rally coming up this weekend. Hans will be running a Timewise computer borrowed from Jim for the first time as a navigator. Looks like the weather will be warmish so road conditions should be plenty sloppy (and fun!)

Wednesday, October 25, 2006

Saab Classic 900 radio wiring chart

When I installed an aftermarket stereo in the 1990 900 a while back, I was able to use a wiring chart I'd found online to make it easier to match the OEM Saab wires with the current standard wires on the new stereo unit.

Went to look for that chart again today and the site that hosted it is down. Nabbed it from the google cache, and now it's available here (pops into a new window).

(originally found at http://www.streetdreams.com/wires/saab/900-1979-93.html, however that site appears to be down as of October 25, 2006.)